Tuesday, April 27, 2010

Quick Arugula and Cannelini Bean Salad

This is a great salad to make as a side dish to fish or any grilled meats. It's also good on its own as a lite lunch (lite lunch? What is wrong with me?). I find myself making this quite a bit actually because it combines some of my favorite flavors -arugula, lemon, parmesean and of course the newly minted public enemy: SALT.


I just use one can of cannelini beans here, no need to boil a pot of beans from scratch for this. It would defeat the purprose of "quick". But one thing I always do with canned beans is give them a good rinse.

1 package of arugula.
Chop up 1 or 2 green onions, depending on how much you like the flavor of onion. My wife doesn't and I often will substitute celery here. I just like the additional texture the onion or celery provides.
After chopping your onion, you should put it in the salad bowl .What else were you going to do with it?
Add the rinsed beans.
Squeeze the juice of one half of a lemon.or 2 tablespoons - may need one whole lemon depending. 

Lots of freshly ground sea salt. I can't say how much this is, it really depends on your taste. But the dressing is just olive oil, lemon and salt, so you really need quite a bit. I know, I know, it's bad for you. But so is reading other people's food blogs and judging them. Yeah. I flipped it on you didn't I?

About a 1/4 cup of olive oil.

About a 1/4 cup of freshly grated parmigiano reggiano. Just spend the money. You should always have this in your fridge. The uses are endless.

Toss and serve.
And here's what it looked like on my plate. Well that's it. We've reached the end of another blog post about food. Aren't we lucky to be alive?! Yay America!

Monday, April 19, 2010

Charcoal 101: Grilled Steak Tacos with Cilantro Pesto

For as many days as we are blessed with warm weather between the months of April and October (November if we're lucky), my usual body odor can best be described as eu'de mountain man which is an intoxicating aroma of campfire smoke with the subtle notes of cheap beer. This is because there are few places I would rather be than in my backyard lighting up some charcoal and tending to a steak while sipping a Bud Light or two while I survey a freshly mowed bakyard as nats dance in the glow of the setting sun. It's heaven. Far be it from me to wax poetic here. Let's get down to the business of cooking.

I actually arrived at the charcoal party quite late in my grilling career. I guess I was like many Americans who are probably scared to attempt cooking the way our forefathers had been for generations (What would I do with the coals when done? Should I use ligher fluid or not? What if I dropped out of Boy Scouts before I was a Webelo?) All these questions and more certainly kept me tied to that propane albatross year after year. But after suffering the embarrassment of my in-laws disapproval when having to run out to three different gas stations for a tank refill in the middle of a Mother's Day cookout, I knew there had to be a better way! 

Cooking with charcoal is very simple and the flavor it imparts is just miles beyond what you get from your gas grill. But don't worry, I've cooked flank steak many times on my gas grill and this recipe will be just fine. So if you don't want to run out and by a Weber just because you read some dude's blog post, you can just skip the parts about lighting a grill below.

What You Will Need:

For the Pesto (this will yield about a cup of pesto)

About one pakced cup of fresh cilantro. (I just tore off about half of a bunch into the food processor)
One green onion
One garlic clove
One jalepeno pepper
Juice of one lime
Salt
Olive Oil

For the Steak:
1 Flank Steak -about 1.5-2 Pounds
1tsp cumin
1tsp chili powder
1tsp grill seasoning (any brand)
Olive Oil

The Goods

Rough chop onion before throwing in the food processor

Depending on how hot you want your pesto, you'll want to scrape out the seeds and veins from the jalepeno. The easiest way I've found to do this is splitting it in half and then using a grapefruit spoon (with the serrated edge) to scrape out the center. Rough chop these guys as well.
Put your cilantro, jalepeno, onion, and one garlic clove in your food processor, turn on low or pulse while slowly pouring in your olive oil until it gets to the consistency of a pesto or a chunky sauce.
Poor contents into bowl, add juice of one lime and salt to taste.

Let's talk a minute about hardwood charcoal vs. briquettes. What I've noticed: 1. Hardwood charcoal (looks like blackened pieces of plywood), will heat up quicker and will produce a hotter fire. However it will not last as long - better for faster cooking, not slow sustained heat. Which is great for a flank steak that you want to get a nice sear on and serve medium to medium-rare. You'll note by the "365 brand" that I find these at Whole Foods (you know, where the liberals shop). What's that in the backround you ask? Well that's my shed, thanks for asking we had it built . . .oh, you mean the chimney starter. We'll get to that.
Chimney starters are great. I never really had any luck getting a fire started the traditional way by building a pyramid of briquettes and hoping they'd ignite. What would usually happen is that I would have to add a lot of lighter fluid and I just could never get paste the taste that it adds to your food. People say you gotta let it cook out, but I don't have time and usually the fire starts dying down by the time it disipates, so I learned how to use the chimney starter and it's awesome. 

Step 1. Take off the top grill rack (you'll notice I'm not concerned about discarding the leftover briquettes that didn't fall through from last time). Then tip over the chimney starter ontop of the bottom grill, and stuff the bottom with 3-4 pieces of crumpled up newspaper.

Step 2. Turn over the chimeny and fill with charcoal.

Step 3. Light the newspaper in a few spots around the chimney
Step 4. Walk Away. It will get smokey. In fact, close the doors and windows to your house so your furniture doesn't smell like the teenage hilltop hideout where you smoked "barkies" with your friends.

Let your steak sit out for about 30min-1hour before cooking. Taking the chill off will help the meat cook more evenly.

Drizzle the steak with olive oil and season it up.

By this time (about 20 minutes or so), your charcoal will start to ash over. All the smoke from the paper has subsided, and you'll see the charcoals on the bottom of the chimney getting red-hot. Once those top pieces are just starting to turn gray, grab the handle and carefulley tip the coals over into the grill. Spread them out being careful not to drop them into the bottom of the bowl.

Put your top rack back on and let heat up for a few minutes and then place your steak on and grill to desired doneness. You can tell by poking it, and how it bounces back if it's done or not. If it's still really "fleshy" and has a lot of give, it's probably medium rare. If it's really firm to the touch, it's closer to well done. You can but a bit off the end to test. With flank you have a piece on the end that's thinner which will more well done which is great if you're like me and have a wife that doesn't like her pieces as rare.

While the steak is resting on a cutting board (so the juices distribute evenly throughout the meat), get your tortillas ready. I take abotu 5 or 6 at a time and place them on a plate covered in a damp paper towel. Pop this in the microwave for 30 seconds and it will bring your store-bought tortillas back to life!  

 Folks I don't want to get political here, but I think this is as an important time as any to make a plea for equal marriage. I mean how can you look at the above photo and not understand why a man might want to marry a perfectly cooked steak? And understand that it's a very holy union indeed.

The finished product. Simple and delicious.
Wednesday, April 14, 2010

Braised Beef Short Ribs with Polenta

This one was made a couple weeks back when the weather was decidedly cooler and lent itself to more hearty fare. With Utah's unpredictable spring temperatures being what they are, I've decided to throw it up here anyway.

When I see short ribs on a restaurant menu I almost always order them. They usually come served on a bed of soft polenta or mashed potatoes. They're not like a typical "rib" that you would see at a barbecue joint, they're more similar to a lamb shank or maybe even a mini-version of a good pot roast where the meat just shreds with a fork. The bone-in short rib is a great cut that at first glance looks like it won't yield much meat. In the package at the grocery store it appears to be mostly bone and a lot of fat, but with slow-braising, the fat melts away resulting in a very tender cut of meat. If you have the time and a little patience you can easily make this dish at home and for a lot less money than you would pay going out.

What you will need
For the Ribs:
2 cups Good red wine (Something you wouldn't mind drinking). A lot of times you can easily substitute cooking stock for wine, but in this case the beef braising in the wine is where a lot of the sweet flavor comes from and the acid in the wine helps to break down that connective tissue in the meat.
1 cup Chicken stock - helps to thin out the sauce, and balances out the flavor of the wine which would be too overpowering if it was the single liquid component in the dish.
1 Medium Onion Chopped
1-2 Carrots Chopped
2 Ribs celery chopped
2 Tbs Tomato Paste
2 Tbs flour for thickening
1 tsp chopped garlic (2 cloves)
1 Bay Leaf
A couple sprigs fresh tyhme (Optional, I just had some on hand).

For the Polenta:
1 tube of pre-cooked polenta (I've seen this at just about every grocery store) Or the box of instant polenta. Just follow the directions on the package.
This is one you could certainly make from scratch, but it involves a lot of babysitting and constant stirring, which after trying the pre-cooked varieties, I don't see the need.

The works.


Olive oil in your pan - a couple tablespoons for browning the meat.


Salt and pepper your ribs.

Keep the vegetable pieces pretty big, similar to what you would serve around a Sunday roast. That sounds pretencious for some reason.
Brown your short ribs on all sides. This will require a good set of tongs.

Once browned, remove from pan.

Also remove about two thirds of the fat. The ribs will continue to release a lot of fat while they braise in the oven.

Add your veggies and garlic and saute a few minutes.

Make some room for the tomato paste and let it cook in the pan for a minute.


Add the flour and let it coat the veggies. It will start to get a bit mucky in the pot at this point without any liquid. DON'T WORRY! You want those brown bits on the bottom of the pan. Also, allowing the flour a couple minutes of cooking time will help cook out some of that raw flour taste.


Deglaze the pan with the 2 cups of wine, vigorously scraping up the browned bits off the bottom of the pan.


The sauce will thicken up quickly at this point. You can add more wine if necessary, but allow it to cook down a bit if you can, if it's getting too thick and starting to stick that's when you add your chicken stock.

At this point, add your fresh herbs.


Place the short ribs back in the pot. Add salt and pepper to taste and throw it in a 300 degree oven for approximately 2 hours. Check every 30 minutes to skim excess fat off the top.

Whisking up my polenta. You can add chicken stock to this, or just water. I sometimes use a little bit of cream if I have it and a pat of butter. Freshly grated parm is good in here too.

Is that the most beautiful Goddamn thing you've ever seen? Don't you want to just live in here? I could seriously spend the rest of my life inside this pot.

This is the man's version of the Tiffany blue box. Ladies, learn to make this for your husbands. If you do, I promise he will do unspeakable things to you. At the very least he'll sit through an entire episode of Glee without complaining.

Are you kidding me with this? Seriously, look at that thing! You can see where I got crazy with the bread-sopping on the plate before taking this picture. I'm not embarrassed by that in the least.

Wednesday, April 7, 2010

The Copper Onion

It seems some restaurant locations are just cursed. That despite their menu offerings, once the public starts to equate the spot with failure they're reluctant to try anything new that dares to occupy it's doomed walls. Like the old Oceans location on Van Winkle and the former Snelgrove building on Fort Union. So needless to say when I first saw signs of a new restaurant about to inhabit the space next to the Broadway theatre I was skeptical. But after reading some initial write-ups on the owners of The Copper Onion, I started to get excited. If I remember correctly, it's a husband and wife team and the wife did a stint at one of my favorite restaurants in New York, the Oyster Bar at Grand Central Station.

That bit of background coupled with some good early reviews bubbled this restaurant up to the top of my list of places I wanted to try for my birthday last night. The Copper Onion is very much part of this new trend of combining seasonal and local ingredients with a nod to a more rustic take on classic american cuisine. I'm going to forgoe a full-on review here because that's not really my intention with this site, but I will say that we really liked what we had, aside from Steph not being crazy about the pork belly salad we shared. What she did seem to enjoy was her wagyu steak with a side of redwood-sized asparagus spears. Even ordered medium well per her state of pregnancy, the steak was incredible. In fact, you might say that all that marbeling in wagyu benefits from a longer cooking time as the fat melts away resulting in a very juicy and tender cut of meat. I had the Utah trout which was prepared very simply, as I imagine most of their dishes are, with just a light fennel salad on top and drizzled with lemon and chili oil. It's probably the best fish dish I've had in town - definitely the best trout I've had this side of Hungtington Canyon.

I wasn't able to take too many photos since it was a bit dark and I just had my iPhone. But here is a shot I got of our cheese and cured meat starter. The one in the back was a Praire Breeze white chedder, the other was a really creamy and mild blue that benefited from the fennel-studded honey in the center and some cantimpalo salami with paprika in the foreground. Great Stuff.


I will definitely be back, especially if they keep High West Distillery's whiskey on the menu. It will save me the trip to Park City. Thanks baby! I had a great time at our adult night out.

You can check out The Copper Onion's website here:

http://www.thecopperonion.com/

Monday, April 5, 2010

Spaghetti Amatriciana

This is my take on a traditional All'Amatrciana sauce. I can't remember where I first had this dish, but I've been making a version of it at home for a few years now. It's a great go-to when I don't feel like going to the store because I typically have most of these ingredients on hand. Also it has bacon in it so if that doesn't compell you to want to make this dish then you probably shouldn't be reading this blog anyway.

Ingredients:
Pancetta or Bacon (like 6-8 ounces)
2 tbsp Olive Oil
1 can whole italian tomatoes
red pepper flakes to taste
1 tbsp chopped shallots or 1 garlic clove and 1/2 medium onion
1 cup white wine
8 oz grated parmegiano reggiano
Any store bought pasta you like

First add a couple tablespoons of olive oil to your pan to help get the bacon rendering. I like the more mild flavor of pancetta in this dish, but honestly I've made it with regular ol' hormel bacon and it's great. Grocery stores (even Wal-Mart!) are starting to sell pre-diced pancetta which is awesome because it can be a bit tricky to cut if you don't let it harden up in your freezer for a couple hours first (that's what she said!). Or have a wicked sharp knife.

After the bacon is nice and crispy, remove it from the pan with a slotted spoon and reserve for later. Discard half of the bacon fat as well.

Next, add your onion and garlic. I didn't have any on hand, so I just used about 2 tablespoons of pre-chopped shallots. Again, whatever you have on hand is fine. And as much as you like is fine too. This recipe is very flexible (That's what she . . okay, grow up).

Let the shallots saute for a while in the bacon fat, if you need to add more olive oil in the pan go ahead.

Once the onion/garlic/shallots become translucent, add about a cup of white wine, if you don't have any that's fine, you can use chicken stock.

Let the alcohol cook out and reduce by half (about 5 minutes).

Retrun the bacon to the pan.

Add in as much chili flakes as you can stand. I like mine pretty spicy. It's probably about a teaspoon.

Next add in your can of whole italian tomatoes (juice and all). I think it's important to use the imported Italian variety here (sometimes referred to as San Marzano), but I realize that's not always easy to find, but if you ever stop by Caputos or Granatos, it's worth picking up a few cans to keep on hand - they make a quick and easy pizza sauce. This was a small 16 oz. can (the size of a can of corn). Sometimes it's difficult to find the Italian tomatoes not in the large 32oz can, if that's all you can find you can freeze half.

I usually crush these in a bowl with my hands first but was trying to save on dishes, so I just dumped them in and smashed them with this potato smasher.

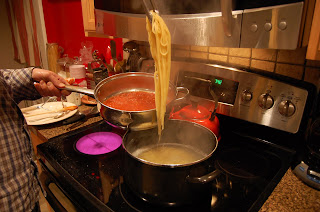
Once your pasta is just about done add it directly to the sauce - NEVER RINSE YOUR PASTA! Leaving the starch on will help the sauce adhere to the pasta, also some of the cooking liquid will help tighten up the sauce. Also, you salted your pasta water, right? Good.

At this point I turn off the heat and let the pasta finish cooking for another couple minutes in the sauce and I add in the cheese. Taste for salt and pepper.

Boom! Finished product. If you had fresh basil on hand you could tear some up and add on top just before serving, but no big deal.

It was very good. No? Are you calling my baby a liar?